
Sheet cake cutting is an essential skill for bakers and event planners, ensuring precise portions and visually appealing slices․ Proper techniques enhance presentation and safety, making it a fundamental step in dessert preparation․
1․1 What is a Sheet Cake?
A sheet cake is a large, rectangular-shaped cake baked in a flat, open pan․ It is typically designed for serving crowds, making it ideal for parties, celebrations, and large gatherings․ Unlike layered cakes, sheet cakes are single-layered and often topped with frosting or glazes․ Their flat surface allows for decorative designs, such as writing or patterns, adding visual appeal․ The simplicity and versatility of sheet cakes make them a popular choice for both casual and formal events, offering ease of serving and portioning․
1․2 Importance of Proper Cutting Techniques
Proper cutting techniques are crucial for achieving even, visually appealing slices and maximizing the number of servings․ Clean cuts ensure minimal waste and prevent the cake from breaking or crumbling, maintaining its presentation․ Even portions are essential for events, as they ensure fairness and consistency in serving sizes․ Additionally, precise cutting enhances safety by reducing the risk of accidents with sharp tools․ Mastering these techniques also extends the cake’s freshness by exposing fewer areas to air․ Overall, proper cutting elevates both the practicality and professionalism of serving sheet cakes, making it a vital skill for any baker or host․
1․3 Brief History of Sheet Cakes
Sheet cakes have a long history as a practical and versatile dessert option, dating back to ancient times when flat cakes were baked for large gatherings․ Their simplicity and scalability made them a staple for celebrations and communal meals․ Over centuries, sheet cakes evolved to incorporate various flavors and decorations, adapting to cultural tastes․ The modern sheet cake gained popularity in the mid-20th century, becoming a standard for parties and events due to its ease of serving and portion control․ Today, they remain a beloved choice, blending tradition with contemporary creativity in both flavor and presentation․

Tools and Equipment Needed for Cutting a Sheet Cake
Essential tools include a serrated knife, cake server, and cutting surface․ Optional items like a turntable or cake stand improve accessibility and precision during slicing․
2․1 Essential Cutting Tools
The primary tools needed for cutting a sheet cake include a long serrated knife for clean cuts, a cake server for portioning, and a sturdy cutting board․ A sharp knife is crucial to avoid tearing the cake, while the server helps in lifting and transferring slices․ Additionally, a non-slip mat or cake stand can stabilize the cake during cutting․ These tools ensure precision, safety, and efficiency, making the process easier and more professional․ Properly using these essentials guarantees even portions and a polished presentation for any event or gathering․
2․2 Optional Equipment for Precision
Optional equipment for precise sheet cake cutting includes a cake turntable, which allows easy access from all sides, and a measuring grid or cake cutter mat for uniform slices․ A serrated offset knife or cake slicer can help achieve straight, even cuts․ Additionally, a cake level ensures the cake is perfectly even before cutting; These tools enhance accuracy and efficiency, especially for large or intricate cakes․ They are ideal for professional bakers or those aiming for flawless presentation․ Using these optional items can elevate the cutting process, making it faster and more precise․
Measuring and Preparing the Cake for Cutting
Measuring the cake’s dimensions ensures accurate portioning, while preparing the surface involves leveling and smoothing to achieve even cuts and a professional appearance․
3․1 How to Measure the Cake Dimensions
To measure the cake dimensions accurately, start by placing it on a flat surface․ Use a ruler or measuring tape to determine the length and width․ Ensure the cake is cooled and crumb-free for precise measurements․ Note the thickness by measuring from the bottom to the top edge․ Record these dimensions to guide your cutting plan․ For even portions, divide the cake into equal sections using these measurements․ This step ensures consistency and helps in achieving uniform slices for serving․ Proper measurement is key to efficient and visually appealing cake cutting․
3․2 Preparing the Cake Surface
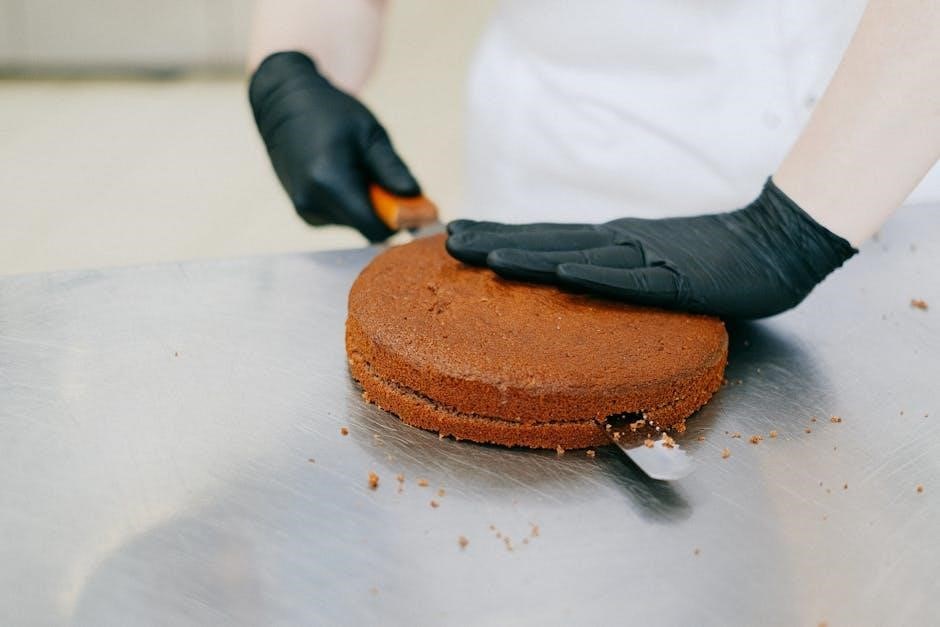
Preparing the cake surface is crucial for clean, even cuts․ Ensure the cake is completely cooled to avoid crumbling․ Use a serrated knife or offset spatula to level the top and remove excess frosting․ Gently sweep away crumbs with a soft brush or damp cloth․ For a smooth surface, lightly press a piece of parchment paper or wax paper over the cake and smooth out any bumps․ This step prevents crumbs from getting stuck in the knife and ensures precise cutting․ A well-prepared surface enhances both the appearance and ease of serving the sheet cake․
Step-by-Step Guide to Cutting a Sheet Cake
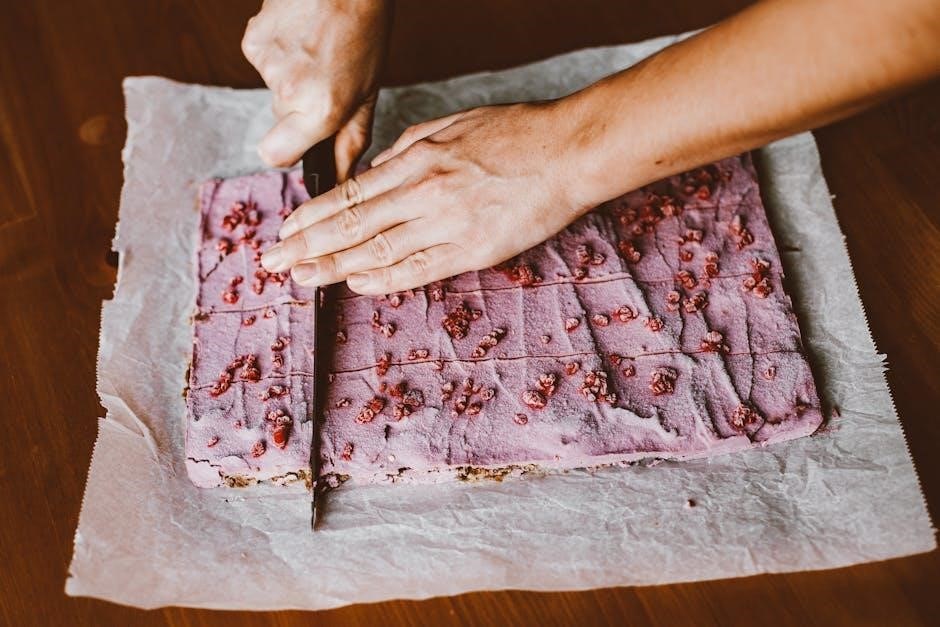
Start by aligning the cake on a flat surface, ensuring stability․ Make the first cut down the middle for even division․ Use a serrated knife to slice gently, achieving uniform portions․ Adjust cuts for any uneven edges to ensure consistency and neatness in each slice․
4․1 Aligning the Cake on the Cutting Surface
Place the sheet cake on a stable, flat surface like a wire rack or large cutting board․ Ensure the cake is centered for even cutting․ Gently adjust its position to align evenly, preventing wobbling or unevenness․ Use a spirit level if needed for perfect alignment; This step ensures precise cuts and uniform slices․ Optional tools like non-slip mats or cake boards can enhance stability․ Proper alignment is crucial for achieving clean, straight cuts and maintaining the cake’s integrity during the slicing process․
4․2 Making the First Cut
Start by placing the sheet cake on a wire rack or cutting board․ Hold a serrated knife straight and level, aligning it with the cake’s edge․ Lightly heat the knife under warm water for a cleaner cut․ Gently press down, moving the knife in a smooth, even motion․ Use a ruler or cake cutter as a guide for precision․ Apply steady, consistent pressure to avoid tearing․ The first cut sets the tone for uniform slices, so precision is key․ Ensure the knife remains straight and level throughout the motion for a clean, professional edge․
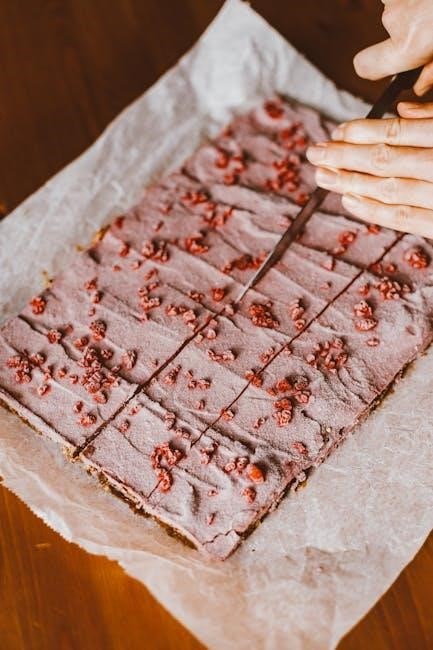
4․3 Achieving Even Portions
To achieve even portions, measure the cake’s width and length to determine equal slice sizes․ Use a serrated knife or cake cutter for clean cuts․ Start by marking the cake into equal sections using toothpicks or a ruler as guides․ Cut in straight, even strokes, applying consistent pressure․ For uniformity, cut the cake into rows and columns, creating identical squares or rectangles․ If desired, use a cake grid or template to ensure precision․ Even portions not only enhance presentation but also make serving easier and fairer for guests․ This step ensures every slice looks and tastes identical․
4․4 Adjusting for Uneven Edges
Uneven edges can occur due to baking inconsistencies or settling․ To address this, use a serrated knife to gently trim irregular edges, ensuring a straight line․ For precision, place the cake on a turntable and rotate it slowly while cutting․ If the cake is domed, level it with a cake leveler before slicing․ Using a ruler or guide can help maintain straight cuts․ For severe unevenness, consider cutting the cake into smaller, uniform sections․ Achieving even edges enhances the cake’s appearance and ensures consistent portion sizes, making it more visually appealing for serving․
Portion Control and Serving Sizes
Portion control ensures consistent serving sizes, enhancing presentation and guest satisfaction․ Standard sheet cakes yield 12-24 slices, depending on size․ Adjust portions using precise cutting tools for accuracy․
5․1 Standard Serving Sizes for Sheet Cakes
Standard serving sizes for sheet cakes are typically 2×2 inches per slice, ensuring uniform portions․ A 9×13-inch cake usually yields 12-15 servings, while a larger 12×18-inch cake provides 24-30 slices․ Adjust sizes based on event needs, such as smaller portions for appetizers or larger slices for desserts․ For precise cutting, use a serrated knife and measuring tools․ Consistent sizing enhances presentation and guest satisfaction, making it easier to plan for dietary restrictions or preferences․ Balancing quantity and visual appeal ensures a professional and efficient serving experience․
5․2 Adjusting Portions for Different Events
Portion sizes can vary based on the event type, ensuring guests receive appropriate amounts․ For formal gatherings like weddings, larger slices (2․5×3 inches) are common, while smaller portions (1․5×2 inches) suit casual parties or buffets․ Corporate events may prefer bite-sized pieces for easy consumption․ Adjusting slice dimensions allows flexibility, accommodating dietary restrictions or preferences․ Using measuring tools and a serrated knife helps maintain consistency․ Tailoring portions enhances the overall experience, ensuring satisfaction and reducing waste․ This adaptability makes sheet cakes versatile for any occasion, from intimate celebrations to large-scale events․
5․3 Cutting for Special Dietary Needs
Cutting sheet cakes for special dietary needs requires careful consideration to ensure inclusivity․ For gluten-free, vegan, or sugar-free portions, use separate cutting tools to prevent cross-contamination․ Clearly label each section of the cake with markers or signs․ Measure and mark the cake surface to divide it into designated areas for each dietary requirement․ Use a serrated knife to make clean cuts, and portion sizes can remain consistent or be adjusted based on specific needs․ This approach ensures every guest can enjoy the cake safely and confidently, making the event accommodating and memorable for all attendees․
Cutting a Frozen Sheet Cake
Cutting a frozen sheet cake requires careful thawing to prevent sogginess․ Use a serrated knife for even portions and a hot knife for smooth edges․ Refreeze promptly after cutting to maintain texture and freshness․
6․1 Thawing the Cake Safely
Thawing a frozen sheet cake requires careful handling to maintain its texture and freshness․ Place the cake in the refrigerator overnight for even thawing, ensuring it remains wrapped to prevent drying․ For faster thawing, leave it at room temperature, covered, but avoid direct heat to prevent sogginess․ Never thaw in hot water or microwaves, as this can damage the structure․ Ensure the cake is completely thawed before cutting to achieve clean slices․ Proper thawing ensures the cake retains its flavor and texture, making it ready for precise and even portioning․
6;2 Tips for Cutting a Frozen Cake
When cutting a frozen sheet cake, use a serrated knife for clean, even slices․ Apply gentle pressure to avoid crumbling, and make shallow initial cuts to guide the knife․ Let the cake sit for a few minutes after cutting to allow the knife to glide smoothly․ For straight cuts, ensure the knife is sharp and warmed slightly with a damp cloth․ Avoid applying too much pressure, as this can cause the cake to break․ Cutting while partially frozen helps maintain structure and prevents the cake from tearing or crumbling excessively․
Achieving Clean and Straight Cuts
Use a serrated knife and ensure it’s sharp to minimize crumbs and tears․ Apply gentle pressure, warming the blade with a damp cloth for smoother cuts․ Guide the knife with a ruler for straight edges, ensuring precise and even portions every time․
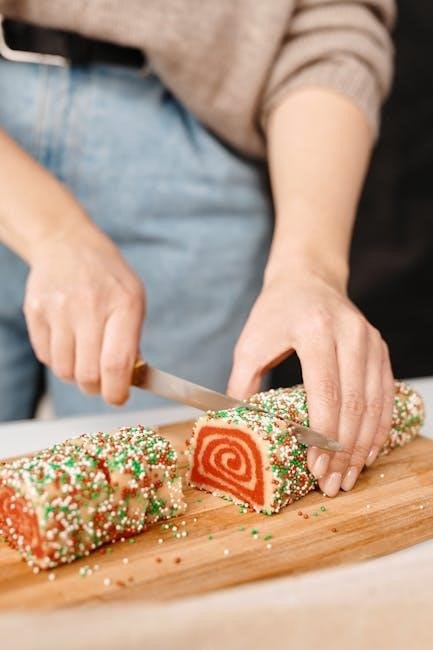
7․1 Using a Serrated Knife
A serrated knife is essential for achieving clean, straight cuts in a sheet cake․ Its toothed edge helps grip the cake, reducing crumbs and tears․ To use effectively, ensure the blade is sharp, as a dull knife can cause uneven cuts and damage the cake․ Apply gentle, consistent pressure, and consider warming the knife with a damp cloth before cutting for smoother results․ This technique minimizes crumbs and ensures precise, even slices, making it a crucial tool for both home bakers and professionals․
7․2 Preventing Crumbs and Tears
To prevent crumbs and tears when cutting a sheet cake, ensure the cake is completely cooled and firm․ Use a sharp serrated knife, as a dull blade can cause uneven cuts and damage the cake․ Lightly warming the knife with a damp cloth before cutting can help it glide smoothly․ Apply gentle, consistent pressure, avoiding excessive force that might tear the cake․ Chilling the cake briefly before cutting can also firm up the layers, reducing the risk of crumbs․ These techniques ensure clean, professional-looking slices every time, making your sheet cake presentation flawless․
Safety Tips for Cutting a Sheet Cake
Always secure the cake on a stable surface and use a sharp knife to prevent accidents․ Keep children away and maintain a firm grip on the knife․ Ensure the cutting area is clear and avoid distractions while cutting․ Never cut toward yourself and keep fingers away from the blade edge․ A clean, stable workspace and proper knife handling are essential for safe and efficient cutting․
8․1 Handling Sharp Objects Safely
Always handle sharp knives and tools with care to avoid injuries․ Use a firm, controlled grip and keep your free hand away from the blade․ Ensure the knife is sharp, as dull blades are more likely to slip․ Cut on a stable, flat surface, and never slice toward yourself․ Keep your fingers curled under and out of the cutting path․ Wear gloves if needed for extra protection․ Store knives in a safe place, out of reach of children; Proper handling ensures a safer and more efficient cutting process․
8․2 Preventing Accidents in the Kitchen
Maintain a clean and clutter-free workspace to minimize tripping hazards and spills․ Use non-slip mats or secure cutting boards to prevent movement during cutting․ Ensure knives are stored safely in designated areas, away from children․ Supervise children when sharp objects are in use․ Keep your attention focused while cutting to avoid accidents․ Regularly inspect tools for damage and replace worn or dull blades․ Proper lighting and ergonomic positioning can also reduce strain and mishaps․ A safe environment ensures efficient and accident-free cake cutting․
Presentation and Serving
Presentation enhances the appeal of sheet cakes․ Arrange slices neatly on a serving tray, garnish with fresh fruits or dust with powdered sugar for a professional look․
9․1 Arranging Slices for Visual Appeal
Arranging sheet cake slices attractively is key to a professional presentation․ Symmetrically place slices on a clean, white platter or cake stand for balance․ Garnish with fresh fruits like strawberries or blueberries, or dust with powdered sugar for added elegance․ Consider adding greenery, such as mint leaves or eucalyptus, around the slices for a fresh, modern look․ Ensure even spacing and align slices uniformly for a polished appearance․ This arrangement not only enhances visual appeal but also makes serving easier and more efficient for guests․
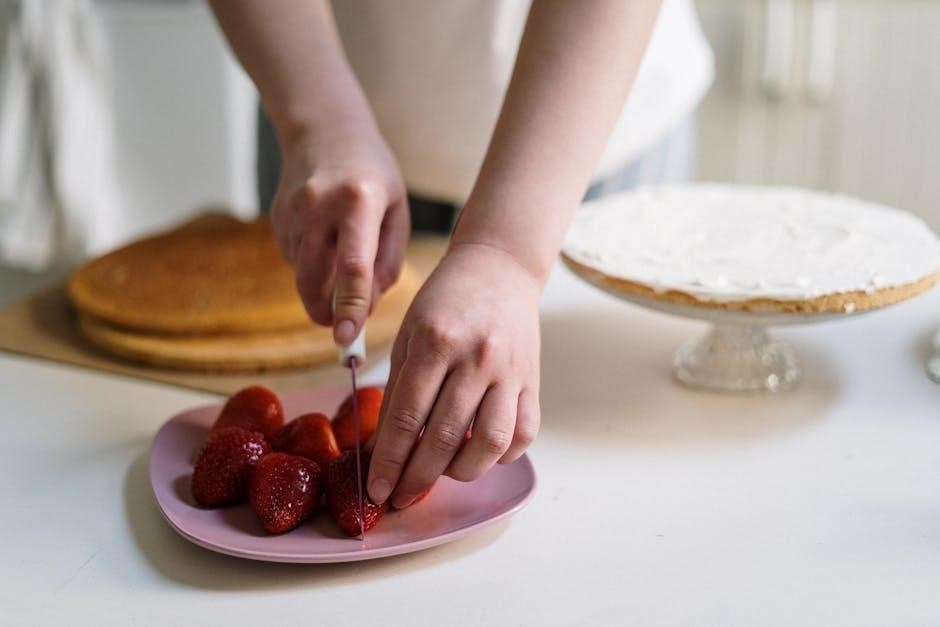
9․2 Garnishing the Cut Cake
Garnishing a cut sheet cake elevates its presentation and appeal․ Fresh fruits like strawberries, blueberries, or raspberries add vibrant color and freshness․ Dusting with powdered sugar creates a clean, elegant look․ For a professional finish, drizzle chocolate glaze or caramel sauce in a zigzag pattern․ Edible flowers or greenery like mint leaves can add a rustic charm․ Sprinkles or chopped nuts provide texture and visual interest․ Apply garnishes just before serving to maintain freshness and ensure the cake looks its best for guests or photography․
Cleaning Up After Cutting
Cleaning up after cutting a sheet cake involves sanitizing tools and surfaces․ Wash knives and utensils with soap and warm water, then sanitize them․ Wipe the cutting area with a damp cloth and discard leftover cake scraps properly to maintain hygiene and safety․
10․1 Sanitizing Cutting Tools
Sanitizing cutting tools is crucial for maintaining hygiene and food safety․ After cutting, wash all tools with warm soapy water to remove cake residue․ Rinse thoroughly and sanitize using a mixture of equal parts water and white vinegar or a food-safe sanitizer; For knives and slicers, a dishwasher cycle can also be effective․ Regular sanitization prevents bacterial growth and ensures tools remain clean for future use․ Always dry tools properly before storage to avoid rust or corrosion․ Cleanliness is key to maintaining quality and safety in cake preparation and serving․
10․2 Disposing of Leftover Cake Safely
Proper disposal of leftover cake is essential for maintaining hygiene and preventing waste․ Store leftover cake in sealed, airtight containers to preserve freshness and prevent contamination․ If the cake is no longer usable, dispose of it responsibly by wrapping it securely in plastic wrap or aluminum foil before discarding․ For eco-friendly options, consider composting organic cake materials or donating leftovers to local food banks or shelters․ Always ensure disposal methods prevent attracting pests and minimize environmental impact․ Safe disposal practices help maintain kitchen cleanliness and contribute to sustainable waste management․

Storing the Cut Cake
Store cut cake in airtight containers to maintain freshness․ Keep at room temperature for up to 2 days or refrigerate for longer storage․ Freeze for extended preservation․
11․1 Short-Term Storage Options
For short-term storage, cut sheet cakes can be kept at room temperature for up to 2 days or refrigerated for 3–5 days․ Use airtight containers to maintain freshness and prevent moisture loss․ Place the cake on a flat surface in the container, ensuring it is tightly sealed․ If refrigerating, allow the cake to come to room temperature before serving for optimal flavor․ Avoid storing in humid environments to prevent sogginess․ Plastic wrap or aluminum foil can be used for extra protection․ Always check for visible signs of spoilage before consuming․
11․2 Freezing Cut Cake for Later Use
Freezing cut sheet cake is an excellent way to preserve freshness for future events․ Wrap individual slices tightly in plastic wrap or aluminum foil, then place them in an airtight container or freezer bag․ Store in the freezer for up to 2-3 months․ When ready to serve, thaw slices in the refrigerator or at room temperature․ Ensure the cake is airtight during thawing to maintain moisture․ Frozen cakes retain their flavor and texture best when used within a few months․ This method is ideal for planning ahead or saving leftovers from large gatherings․
Troubleshooting Common Issues
Address common cutting issues like uneven layers or jagged edges by adjusting knife alignment and applying gentle pressure․ Ensure tools are sharp for clean, precise cuts․
12․1 Dealing with Uneven Layers
Uneven layers in a sheet cake can occur due to improper alignment or uneven frosting․ To fix this, ensure the cake is placed on a level surface and use a serrated knife to gently even out the layers․ Apply light pressure and make smooth, consistent cuts․ If the cake is frozen, allow it to thaw slightly before cutting․ Using a cake leveler or a long, sharp knife can also help achieve uniform slices․ Always cut in one direction and avoid sawing motions to maintain evenness and prevent breaking the cake structure․
12․2 Fixing Jagged Edges
Jagged edges on a sheet cake can be smoothed by using a serrated knife to make small, precise cuts along the uneven areas․ Lightly saw back and forth, applying gentle pressure to avoid tearing the cake․ For a cleaner finish, dip the knife in hot water, wipe it dry, and slice in one smooth motion․ To prevent jagged edges, ensure the knife is sharp and cut in a single, continuous stroke․ If the cake is frozen, allow it to thaw slightly before cutting․ Using a cake stand can also help maintain control and achieve straighter edges․
Expert Tips for Cutting Sheet Cakes
Mastering sheet cake cutting requires a sharp serrated knife, a steady hand, and precise alignment․ Dipping the knife in hot water ensures smooth, even cuts․ Elevate your technique with a cake stand for better control and cleaner slices․
13․1 Professional Techniques for Clean Cuts
Professional techniques for clean cuts involve using a serrated knife, chilling the cake to firm it, and dipping the knife in hot water between slices․ A cake stand ensures stability, while applying gentle, even pressure minimizes crumbs․ Cutting in a smooth, sawing motion prevents tearing․ For precise edges, freeze the cake briefly before cutting․ These methods ensure uniform portions and a polished appearance, elevating your sheet cake presentation to professional standards․
13․2 Avoiding Common Mistakes
Common mistakes when cutting sheet cakes include applying too much pressure, which can tear the cake, and using a dull knife, leading to jagged edges․ Cutting without a plan may result in uneven portions․ To avoid these errors, use a serrated knife, apply gentle, even pressure, and dip the knife in hot water between cuts for smoother slices․ Letting the cake cool completely before cutting prevents crumbling, while marking guidelines ensures uniformity․ Avoiding overhandling the knife and maintaining a steady hand also helps achieve professional-looking results․
Mastering sheet cake cutting requires the right tools, precise techniques, and careful planning, ensuring a professional presentation and consistent portions for every occasion and enjoyment․
14․1 Summary of Key Points
Sheet cake cutting involves essential tools like serrated knives and measuring guides․ Proper techniques ensure even portions, while safety measures prevent accidents․ Presentation enhances visual appeal, and storage tips maintain freshness․ Understanding portion control, handling frozen cakes, and avoiding common mistakes are crucial․ Clean cuts are achieved with the right blade and preparation․ Sanitizing tools and disposing of leftovers safely are final steps․ Mastering these elements ensures perfectly cut cakes for any event, making sheet cake cutting a valuable skill for bakers and hosts alike․ Attention to detail and practice lead to professional results every time․
14․2 Final Tips for Perfect Sheet Cake Cutting
For flawless sheet cake cutting, use a serrated knife and ensure the cake is at room temperature․ Chill the cake before slicing to minimize crumbs․ Always cut on a stable surface and use a cake lifter for safe transfers․ Arrange slices neatly for visual appeal and garnish sparingly to enhance presentation․ Store leftovers promptly in an airtight container to maintain freshness․ Practice makes perfect, so refine your technique with each cake․ By following these tips, you’ll achieve professional-looking results and impress your guests with every slice․